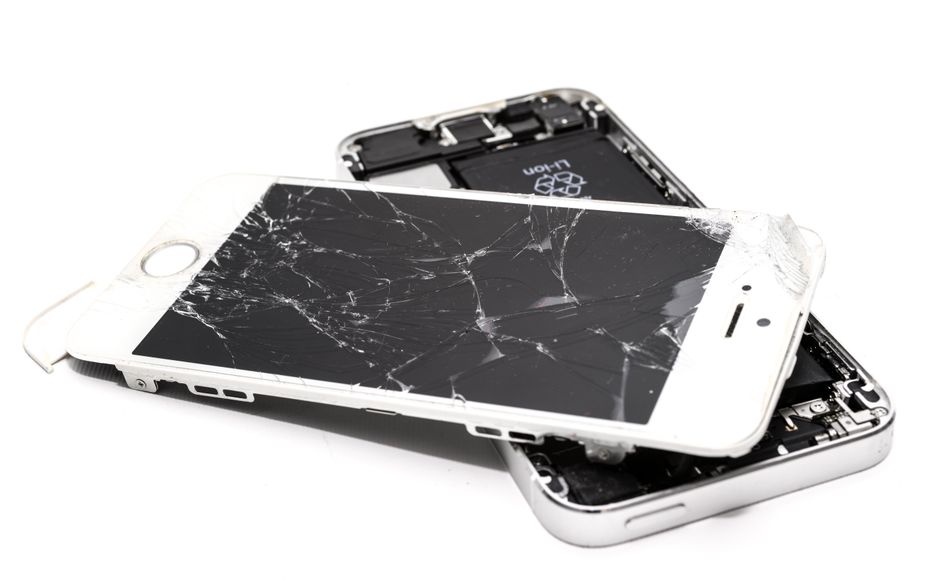
Fixing a broken charging port might sound daunting, especially when even a small mistake can make your device unusable. Most people do not realize that over 60 percent of phone charging issues can be solved with the right preparation and a simple cleaning. Yet what actually surprises most DIYers is this: the hardest part usually is not the repair itself, but skipping the simple steps that would have prevented damage in the first place.
Table of Contents
- Step 1: Gather Necessary Tools And Materials
- Step 2: Power Down The Device For Safety
- Step 3: Inspect The Charging Port For Damage
- Step 4: Clean The Charging Port Carefully
- Step 5: Replace The Charging Port If Needed
- Step 6: Test The Device’s Charging Functionality
Quick Summary
| Key Point | Explanation |
|---|---|
| 1. Prepare tools and workspace | Gather essential tools like screwdrivers and a clean area for effective device repair. |
| 2. Power down the device completely | Ensure no residual charge remains by fully shutting down devices before starting repairs. |
| 3. Inspect charging port for damage | Examine for debris, bent pins, or corrosion to assess repair needs. |
| 4. Clean the charging port carefully | Use non-conductive tools to gently remove dirt and blockages without damaging internal components. |
| 5. Test charging functionality post-repair | Verify successful repair by testing with certified charging cables and multiple power sources. |
Step 1: Gather necessary tools and materials
Before attempting to fix a charging port, preparation is key to ensuring a smooth and successful repair process. Having the right tools and workspace ready will significantly improve your chances of resolving the issue without causing additional damage to your device.
To begin, you’ll need a carefully curated set of tools that allow precise and careful manipulation of delicate electronic components. Essential tools for charging port repair include:
- Small Phillips head screwdriver
- Plastic pry tools or spudgers
- Precision tweezers
- Magnifying glass or jeweler’s loupe
- Anti static wrist strap
- Clean microfiber cloth
- Isopropyl alcohol (90% or higher concentration)
- Soft bristled brush
Your workspace matters as much as your tools. Select a clean, well lit area with a flat surface and minimal distractions. A white or light colored background can help you track small components and screws during the repair process. Ensure you have good lighting and preferably use a soft mat or towel to prevent scratching your device or losing tiny parts.
Before starting, power down your device completely and remove any case or protective covering. According to iFixit’s professional repair guidelines, creating an organized workspace with clearly labeled areas for each component can dramatically reduce the risk of losing critical parts during the repair.
Carefully inspect your charging port beforehand to understand the specific issues you’re facing. Look for visible debris, bent pins, or signs of corrosion that might require specialized handling. Having a clear understanding of the problem will help you select the most appropriate tools and approach for your specific repair scenario.
Lastly, work slowly and deliberately. Rushing through the preparation or repair process increases the likelihood of causing additional damage. Patience and methodical approach are your best allies when attempting to fix a charging port.
Here is a quick-reference table that details the tools and materials needed for charging port repair, summarizing each tool’s purpose for efficient preparation.
| Tool/Material | Purpose |
|---|---|
| Small Phillips head screwdriver | Remove screws and access internal components |
| Plastic pry tools or spudgers | Safely open device casing without causing scratches |
| Precision tweezers | Handle small screws and delicate internal parts |
| Magnifying glass or jeweler’s loupe | Inspect charging port for fine damage or debris |
| Anti static wrist strap | Prevent static discharge that could damage components |
| Clean microfiber cloth | Wipe away dust and fingerprints from device |
| Isopropyl alcohol (90%+) | Clean surfaces (not to be used inside the charging port) |
| Soft bristled brush | Gently remove dust and lint from the charging port |
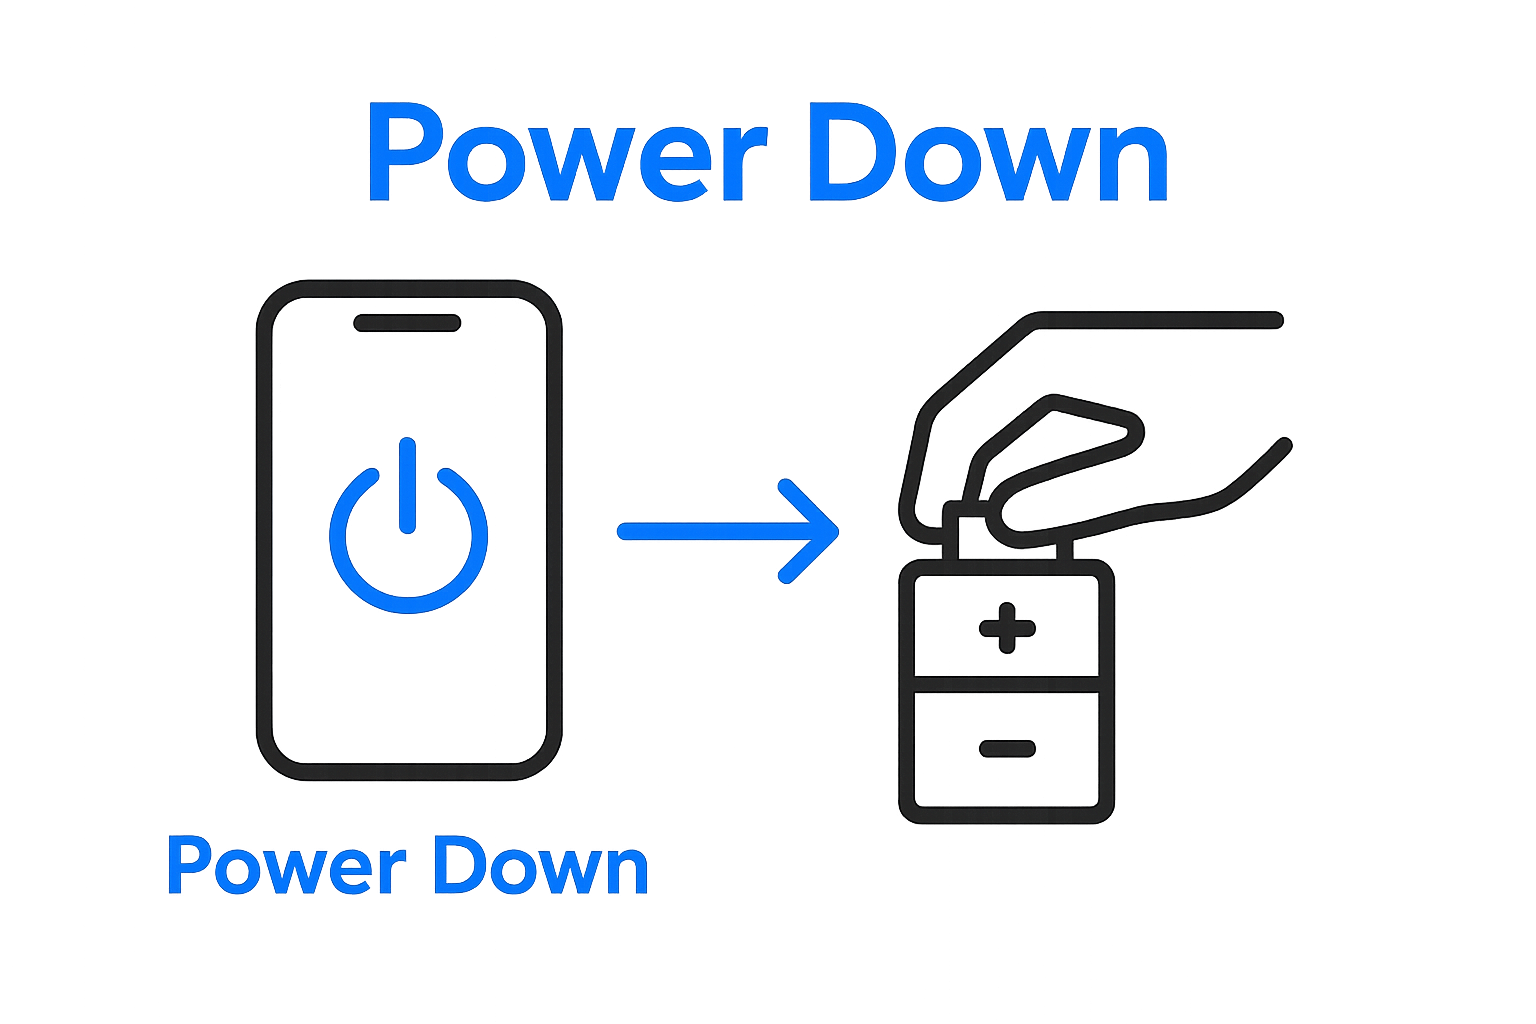
Step 2: Power down the device for safety
Powering down your device is a critical safety step that protects both you and your electronic device during the charging port repair process. Electricity can be unpredictable, and working on a powered device increases the risk of short circuits, data loss, and potential personal injury.
Power down completely involves more than just pressing the power button. For most smartphones and tablets, this means performing a full shutdown that ensures no residual electrical charge remains in the system. Different devices have slightly varied shutdown procedures, but the general principle remains consistent across most modern electronics.
For most smartphones and tablets, the shutdown process involves pressing and holding the power button until a slider or confirmation screen appears. Do not simply press the button briefly. Hold the button down for several seconds until you see clear options to power off or shut down. On some devices, you might need to slide a virtual power off switch or select “Power Off” from an onscreen menu.
After initiating the shutdown, wait approximately 30 seconds before proceeding. This brief waiting period allows the device to completely discharge any remaining electrical current and safely power down all internal components. According to Apple’s official support documentation, completely powering down helps prevent potential electrical issues during repairs.
For devices with removable batteries, the safest approach is to physically remove the battery if possible. Carefully disconnect the battery from the device, ensuring you do not touch any exposed electrical contacts. This method provides the most comprehensive electrical isolation and eliminates any potential for unexpected power surges during your repair process.
Verify that your device is completely powered off by checking the screen.
 There should be no illumination, and the display should be entirely blank. If you see any signs of activity or residual screen glow, repeat the shutdown process. Remember that some devices might have subtle indicator lights that remain active even during shutdown, so a completely dark screen is your best confirmation of a full power down.
By taking these careful steps to power down your device, you significantly reduce the risk of electrical damage and create a safer environment for your charging port repair attempt.
Step 3: Inspect the charging port for damage
Careful inspection of your device’s charging port is a crucial step in diagnosing potential issues that might be preventing proper charging. This examination requires patience, good lighting, and a methodical approach to identify subtle signs of damage that could compromise your device’s functionality.
Begin by using your magnifying glass or jeweler’s loupe to examine the charging port closely. Look for obvious physical indicators such as bent pins, accumulated debris, corrosion, or visible signs of wear. The internal metal contacts should appear clean, straight, and free from discoloration. Rust colored spots, greenish residue, or bent connectors are serious warning signs that indicate potential long term damage.
Lighting plays a critical role in this inspection. Natural daylight or a bright LED lamp will help you see minute details that might be invisible under standard indoor lighting. Tilt the device at different angles to catch light reflections that can reveal scratches, micro dents, or structural irregularities in the charging port.
Physical contamination is a common culprit behind charging issues. Lint, dust, and pocket debris can accumulate over time, creating barriers that prevent proper electrical connection**. Use your soft bristled brush to gently remove any visible particles. Move the brush in one direction to avoid pushing debris further into the port. If you notice significant buildup, a can of compressed air can help dislodge stubborn dirt without risking damage.
Structural damage requires careful assessment. Loose or wobbling charging ports might indicate internal connector problems that go beyond surface level issues. Gentle wiggling of the port can help you detect whether the internal mechanism has become detached or compromised. If you’re experiencing persistent charging problems, our comprehensive guide can help you troubleshoot.
According to Apple’s technical support documentation, signs of significant charging port damage include visible bent pins, excessive debris, or structural misalignment. These indicators suggest that professional repair might be necessary rather than attempting a DIY fix.
Verification is key in this step. After your thorough inspection, you should have a clear understanding of the charging port’s condition. Look for clean metal contacts, no visible debris, straight pins, and no signs of corrosion or physical damage. If you detect any of these issues, prepare for a more detailed repair strategy in the upcoming steps.
Use this troubleshooting table to quickly match common charging port issues with likely causes and recommended actions, helping streamline your repair process.
| Problem | Likely Cause | Recommended Action |
|---|---|---|
| Device not charging | Debris or lint in charging port | Clean charging port carefully |
| Loose cable connection | Bent or damaged internal pins | Inspect and consider replacement |
| Charging only at an angle | Misaligned or loose charging port | Inspect for internal damage |
| Slow charging or intermittent connection | Corrosion or poor contact | Clean and inspect port |
| No charging response after cleaning | Severe port or board damage | Replace port or seek professional help |
| Charging cable fits loosely | Worn or broken port mechanism | Prepare for possible replacement |
| Overheating during charging | Short circuit, internal damage | Stop use and consult a professional |
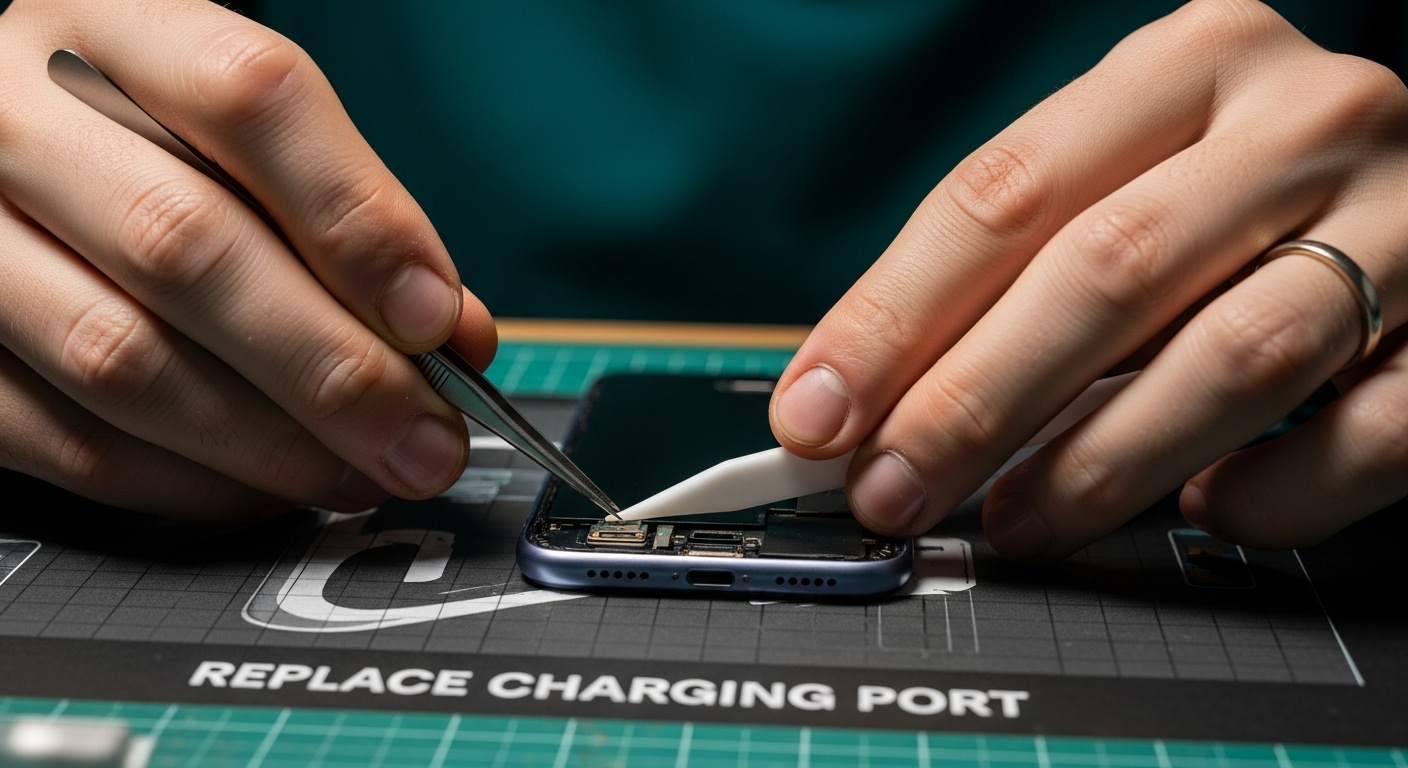
Step 4: Clean the charging port carefully
Cleaning your device’s charging port requires an extremely delicate touch and precise technique. The goal is to remove debris and potential blockages without causing additional damage to the sensitive internal connectors that enable your device’s electrical connections.
Preparation is critical before attempting any cleaning. Ensure you have soft, non conductive tools like a wooden or plastic toothpick, compressed air, and a soft bristled brush specifically designed for electronics. Avoid metal implements that could scratch or permanently damage the port’s interior surfaces.
Begin by using compressed air to gently blow out loose particles. Hold the can upright and use short, controlled bursts to prevent moisture condensation. Aim the nozzle at an angle rather than directly into the port, which helps prevent pushing debris further inside. Maintain a distance of approximately 4 to 6 inches between the compressed air nozzle and the charging port to minimize potential pressure damage.
If compressed air does not fully clear the debris, transition to a soft bristled brush. Use gentle, unidirectional strokes to remove accumulated dust and lint. Move the brush in one consistent direction to avoid pushing particles deeper into the port. The brush should be clean, dry, and designed specifically for electronic components to prevent potential static discharge.
For stubborn debris, a wooden or plastic toothpick can be carefully used. Never insert the toothpick directly into the port. Instead, very lightly drag the tip along the port’s edges to coax out trapped particles. Apply minimal pressure and work slowly to prevent accidental damage to the delicate internal pins.
According to The New York Times Wirecutter guide, alcohol based cleaning solutions are not recommended for charging ports. Moisture can cause significant internal damage and potentially create short circuits in your device’s electrical system.
Verification is crucial after cleaning. Inspect the port using your magnifying glass to confirm all visible debris has been removed. The port should appear clean, with no visible dust or lint. Gently rotate the device to check from multiple angles. If you remain uncertain about the cleaning process or notice any persistent issues, consulting a professional repair service is always recommended.
Step 5: Replace the charging port if needed
Charging port replacement represents the most complex step in device repair, requiring precision, patience, and technical skill. This stage is recommended only if previous cleaning and inspection steps have not resolved your charging issues and you have confirmed definitive port damage.
Determining whether replacement is truly necessary involves careful assessment. Signs indicating a mandatory replacement include visibly bent or broken internal pins, significant corrosion, loose mechanical connections, or consistent charging failures even after thorough cleaning. Professional diagnostic tools can help confirm these suspicions, but experienced technicians often recognize critical damage through visual and tactile examination.
Before attempting replacement, confirm you have an exact matching replacement part for your specific device model. Purchasing generic or incompatible charging ports can permanently damage your device. Research your exact smartphone or tablet model number and source a genuine replacement part from reputable electronics suppliers. Avoid cheap, unverified alternatives that might compromise your device’s functionality.
The replacement process demands a methodical approach. Gather specialized tools like precision screwdrivers, anti static wrist straps, and soft prying tools. Begin by carefully disassembling your device, which typically involves removing the back panel or screen. Each device model has unique disassembly procedures, so consulting model specific repair guides becomes crucial.
According to iFixit’s professional repair documentation, device disassembly requires extreme caution. Disconnect the battery, ground yourself to prevent static discharge, and organize removed components systematically. Take photographs during disassembly to help you reassemble the device correctly.
Our iPad repair specialists recommend professional intervention if you feel uncertain about any step of the replacement process. Improper installation can cause irreversible damage to your device’s internal circuitry.
After carefully removing the old charging port and installing the new one, reconnect all necessary cables and ensure proper alignment.
 Test the new port by connecting a charging cable and verifying successful power transmission. Reassemble your device completely and perform a comprehensive functionality check to confirm successful repair.
Step 6: Test the device’s charging functionality
Testing your device’s charging functionality is a critical final step that validates the success of your repair efforts. This comprehensive verification process ensures that all previous repair steps have effectively resolved the charging port issues and restored your device’s power connection.
Begin the testing process by using an original manufacturer certified charging cable. Avoid third party cables that might provide inconsistent electrical connections or potentially damage your newly repaired charging port. Plug the cable into a reliable power source and carefully insert the connector into the charging port, paying close attention to the connection’s smoothness and stability.
Observe the device’s initial charging response carefully. Look for immediate indicators of successful charging: the battery icon should appear with a charging animation, the screen might illuminate, or a small LED indicator should activate. These signs confirm that electrical current is successfully passing through the newly repaired charging port. If no response occurs, gently wiggle the cable to ensure a secure connection, but avoid excessive force.
Multiple charging scenarios require thorough testing. Use different power sources like wall adapters, computer USB ports, and portable battery packs to eliminate potential external charging issues. Each connection method provides a unique test of your charging port’s functionality. Pay attention to charging speed, consistency of power transfer, and any unusual behaviors like intermittent charging or sudden disconnections.
Battery performance monitoring becomes crucial in the days following your repair. Track your device’s charging duration, battery percentage increase, and overall battery health. Sudden drops in charging efficiency or unexpected battery drain could indicate underlying issues not immediately visible during initial testing.
According to Apple’s official support guidelines, consistent charging performance across multiple power sources and stable battery percentage increases are key indicators of a successful charging port repair. Unexpected fluctuations might suggest the need for professional assessment.
If you experience any persistent charging problems after your repair attempt, professional intervention becomes necessary. Subtle electrical issues can be challenging to diagnose without specialized equipment. Trust your observations and do not hesitate to seek expert assistance if your device continues to exhibit charging inconsistencies.
Don’t Let Charging Port Issues Stop Your Day
Struggling with a slow or unresponsive charging port after following every troubleshooting step? Persistent problems like loose connections, bent pins, or ongoing charging failures often signal deeper internal issues that DIY fixes can’t resolve. These challenges frequently lead to frustrating situations where your phone or tablet can’t keep up with your busy life, leaving you disconnected and searching for a reliable solution fast.
Discover expert iPhone charging port repairs for stuck or broken ports at Dash Repairs. Our skilled technicians use advanced diagnostic tools and genuine parts, offering fast turnaround times and warranties so you never have to risk costly mistakes or voided warranties doing it on your own. We specialize in quick, affordable service for iPhones, iPads, Androids, and more.

Stop worrying about damaging your device any further or wasting more time with unreliable fixes. Get back to what matters and let the local pros at Dash Repairs handle your charging port repair. Book your repair today and enjoy peace of mind knowing your device is in the hands of trusted professionals.
Frequently Asked Questions
How do I know if my charging port is damaged?
Look for visible signs such as bent pins, corrosion, or debris in the port. If the device does not charge even after cleaning the port, it may need a replacement.
What tools do I need to fix a charging port?
You will need a small Phillips head screwdriver, plastic pry tools, precision tweezers, a magnifying glass, an anti-static wrist strap, a clean microfiber cloth, isopropyl alcohol, and a soft bristled brush.
How do I clean a charging port without damaging it?
Use compressed air to blow out loose debris and a soft bristled brush for stuck particles. Avoid metal tools; instead, you can use a wooden or plastic toothpick to gently coax out debris without scratching the interior.
What should I do if my device still does not charge after attempting repairs?
If the device doesn’t charge after cleaning or inspecting the port, you may need to replace the charging port or seek professional assistance to diagnose any underlying issues.
Recommended
- Phone Not Charging? Try this ! | Dash Cellular Repair | Cell Phone, iPhone, Laptop Repair in Oklahoma
- Uncategorized | Dash Cellular Repair | Cell Phone, iPhone, Laptop Repair in Oklahoma
- Choosing the Right Cell Phone Repair Shop | Dash Cellular Repair | Cell Phone, iPhone, Laptop Repair in Oklahoma
- blog | Dash Cellular Repair | Cell Phone, iPhone, Laptop Repair in Oklahoma