Fixing a cracked screen or a dead battery can feel like a job for the pros, yet millions of people attempt DIY tech repairs every year. Most never realize that improper DIY repairs cost Americans over $2 billion in damaged devices annually. The real surprise is that some of the safest and most practical fixes are easier than you think, if you spot the hidden risks that trip up even experienced tinkerers.
Table of Contents
- Basic Steps For Fixing A Cracked Smartphone Screen
- How To Replace A Dead Battery In Your Device
- Fixing Audio Issues: Troubleshooting And Solutions
- Cleaning And Repairing Charging Ports
- Resolving Software Glitches: A Step-By-Step Guide
- Upgrading Storage: How To Install A New Ssd
- Simple Diy Solutions For Overheating Devices
- When To Seek Professional Help For Device Repairs
Quick Summary
| Takeaway | Explanation |
|---|---|
| Assess screen damage before repair | Different damage types require different approaches; not all cracks need replacement. |
| Use proper tools and safety measures | Gather precision tools, work slowly, and ground yourself to avoid static damage. |
| DIY repairs may not be feasible | Some complex issues, like motherboard failures or water damage, need expert handling to ensure safety and device function. |
| Backup data before troubleshooting | Protect your information from loss during processes like software resets or SSD upgrades. |
| Consult professionals for persistent issues | If basic troubleshooting fails, professional help may identify deeper problems that require specialized tools. |
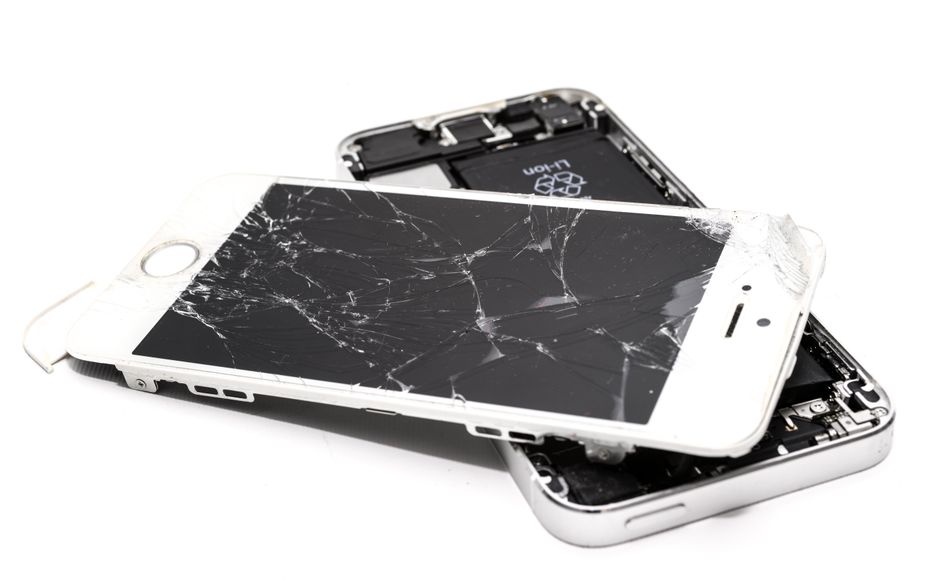
1: Basic Steps for Fixing a Cracked Smartphone Screen
Dealing with a cracked smartphone screen can be frustrating, but understanding some basic repair techniques can save you time and money. Before attempting any repairs, gather the necessary tools and assess the damage carefully. Smartphone screen repairs require precision and patience.
The first step involves examining the extent of the screen damage. Not all cracks are identical some are minor surface scratches, while others involve deep structural damage. Look closely at the crack pattern and determine whether it’s a surface-level issue or a more serious problem that compromises screen functionality.
Before starting the repair, you’ll need specific tools. According to Elon University’s Maker Hub, an effective smartphone repair kit should include:
- Precision screwdriver set
- Plastic opening tools
- Tweezers
- Anti-static wrist strap
- Replacement screen (if necessary)
Safety is paramount during any device repair. Always work in a clean, well-lit area and consider these critical precautions:
- Disconnect the device from power sources
- Ground yourself to prevent static electricity damage
- Work slowly and methodically
- Keep track of every screw and component you remove
For minor cracks, temporary solutions like applying a screen protector can prevent further damage and potentially stabilize the existing screen. However, significant damage will likely require professional intervention or complete screen replacement.
Remember that each smartphone model has unique repair requirements. What works for an iPhone might not apply to an Android device. Research your specific device’s repair guidelines and consider your technical comfort level before proceeding. If you’re uncertain about any step, consulting a professional repair service is always the safest option.
2: How to Replace a Dead Battery in Your Device
Device battery replacement is a critical skill for extending the life of your smartphone, tablet, or laptop. Understanding the right approach can save you significant money and prevent unnecessary device replacement. While battery replacement might seem intimidating, many modern devices are designed with user accessibility in mind.
Before starting the battery replacement process, gather the necessary tools and take appropriate safety precautions. According to the University of Vermont, using the correct battery type and following manufacturer guidelines is crucial for safe replacement.
You’ll need specific tools for a successful battery replacement:
- Small precision screwdriver set
- Plastic prying tools
- Replacement battery matching your device specifications
- Clean workspace with good lighting
- Anti-static wrist strap (recommended)
Battery replacement difficulty varies significantly between device models. Smartphones like iPhones and newer Android models often require professional tools and specialized knowledge. Laptops typically offer easier battery access, with many models designed for user replacement.
Before attempting replacement, consider these critical safety recommendations:
- Completely power down the device
- Disconnect from any power source
- Work in a static-free environment
- Handle batteries with care to prevent puncturing
- Wear protective eyewear if possible
If you’re uncomfortable with any step of the battery replacement process, consulting a professional repair service is always the safest option. Improper battery replacement can damage your device or potentially create safety risks. Modern lithium-ion batteries require careful handling and specific techniques to ensure safe removal and installation.
Always purchase replacement batteries from reputable sources and verify compatibility with your specific device model. Cheap, off-brand batteries can compromise device performance and potentially create safety hazards.
3: Fixing Audio Issues: Troubleshooting and Solutions
Audio problems can transform an otherwise functional device into a frustrating experience. Whether you’re dealing with a smartphone, laptop, or tablet, understanding how to diagnose and resolve sound issues can save you time and money. Most audio problems stem from software configurations, hardware limitations, or simple connectivity problems.
According to Northern Michigan University, diagnosing audio issues requires a systematic approach. The initial troubleshooting steps involve checking several critical areas:
- Verify volume settings are not muted
- Check cable connections
- Test different audio output devices
- Ensure software and drivers are updated
- Restart the device
Sound problems manifest in various ways, from complete audio silence to distorted, crackling output. Some issues are software related, while others might indicate more serious hardware damage. Identifying the specific symptoms helps narrow down potential solutions.
For mobile devices and laptops, basic troubleshooting techniques can often resolve audio problems. Start by checking system volume levels and ensuring no background applications are interfering with sound output. Bluetooth and wireless connection settings can sometimes cause unexpected audio interruptions.
Critical considerations for resolving audio issues include:
- Checking for physical damage to speakers or audio jack
- Updating device operating system
- Resetting sound settings to default
- Testing audio in safe mode
- Investigating potential software conflicts
Professional repair might be necessary if basic troubleshooting fails to resolve the issue. Some audio problems indicate deeper hardware damage that requires specialized diagnostic tools and expertise. Persistent crackling, complete sound loss, or intermittent audio performance often suggest internal component problems.
Remember that each device model has unique characteristics. What works for one smartphone might not apply to another. Patience and methodical investigation are key to successfully diagnosing and resolving audio issues.
4: Cleaning and Repairing Charging Ports
Charging port issues can quickly render your device unusable, making this repair skill crucial for maintaining device functionality. Dust, lint, and debris accumulation are common culprits behind charging problems, often requiring careful cleaning and precise intervention.
According to University of California, Santa Barbara’s Sustainable Technology Repair Initiative, addressing charging port problems requires a methodical approach. Understanding the delicate nature of these ports is essential to prevent additional damage during repair attempts.
Potential charging port issues include:
- Loose connection
- Debris blocking electrical contact
- Bent or damaged metal connectors
- Intermittent charging
- Complete charging failure
Cleaning requires extreme precision and the right tools. You’ll need:
- Soft, non-metallic cleaning tool (plastic toothpick)
- Compressed air
- Bright light source
- Magnifying glass (optional)
Before attempting any repairs, check our warranty information to understand potential service coverage. Aggressive cleaning can void device warranties, so proceed with caution.
While cleaning, avoid using metal objects or excessive force. Gently remove visible debris using a plastic toothpick, holding the device at an angle that allows gravity to help dislodge particles. Compressed air can help remove stubborn dust without direct contact.
If basic cleaning doesn’t resolve charging issues, the problem might involve internal electrical connections. Professional diagnostic services can identify more complex port damage that requires specialized repair techniques.
Remember that different devices have unique charging port designs. What works for a smartphone might not apply to a tablet or laptop. Always research your specific device model and consult professional repair guides if you’re uncertain about any step in the process.
5: Resolving Software Glitches: A Step-by-Step Guide
Software glitches can transform a seamless digital experience into a frustrating nightmare. Understanding how to diagnose and resolve these technical hiccups is an essential skill for any device user. Modern devices rely on complex software systems that occasionally malfunction, requiring systematic troubleshooting approaches.
According to California Department of Education, resolving software problems requires a methodical strategy. Identifying the root cause of a glitch is more important than applying quick fixes that might temporarily mask underlying issues.
Common software glitch indicators include:
- Unexplained system slowdowns
- Frequent application crashes
- Unresponsive user interface
- Random error messages
- Unexpected battery drainage
Effective troubleshooting involves a structured approach. Begin by documenting the specific symptoms and circumstances under which the glitch occurs. This information helps narrow down potential causes and solutions.
Key troubleshooting steps include:
- Restart the device completely
- Check for pending software updates
- Clear application cache
- Uninstall and reinstall problematic applications
- Perform a factory reset as a last resort
Some glitches might indicate deeper system problems that require professional intervention. Persistent issues could signal hardware conflicts or more significant software corruption. In such cases, consulting a professional repair service becomes crucial.
Remember that each device and operating system has unique characteristics. What resolves a problem on one smartphone might not work identically on another. Patience, systematic investigation, and careful documentation are your best tools when addressing software challenges.
Always backup your data before attempting significant troubleshooting steps that might result in data loss. Systematic problem-solving and a calm approach will help you navigate most software glitches effectively.
6: Upgrading Storage: How to Install a New SSD
Upgrading to a Solid-State Drive (SSD) can dramatically transform your device’s performance, offering faster data access and improved system responsiveness. Understanding the installation process helps you breathe new life into older computers and laptops without significant financial investment.
According to GeeksforGeeks, SSDs provide substantial advantages over traditional hard drives, including enhanced speed and durability. Selecting the right SSD requires careful consideration of your specific device requirements.
Essential tools for SSD installation include:
- Precision screwdriver set
- Anti-static wrist strap
- Replacement SSD matching device specifications
- Backup storage device
- Cloning software
Preparation is crucial before beginning the installation. Back up all existing data to prevent potential loss during the upgrade process. This step ensures you can seamlessly transfer your information to the new drive.
Critical considerations for SSD installation:
- Verify compatibility with your device model
- Check connection interface (SATA, M.2, NVMe)
- Measure existing drive dimensions
- Confirm available mounting space
- Understand potential warranty implications
The installation process involves carefully removing the existing drive, connecting the new SSD, and transferring your operating system and data. Some devices require specific mounting brackets or adapters, so research your particular model’s requirements beforehand.
While many users can successfully complete an SSD upgrade, complex installations might necessitate professional assistance. If you’re uncomfortable with any step, consulting a repair technician can prevent potential device damage.
Remember that each device has unique specifications. What works for one laptop might differ significantly from another. Patience, careful research, and methodical execution are key to a successful SSD upgrade.
7: Simple DIY Solutions for Overheating Devices
Device overheating represents a serious performance and safety concern that can potentially damage internal components and compromise your device’s functionality. Understanding the root causes and implementing practical cooling strategies can help prevent long-term damage and extend your device’s operational lifespan.
According to National Library of Medicine research, device overheating stems from multiple interconnected factors. Identifying and addressing these issues requires a comprehensive approach that combines preventive maintenance and strategic interventions.
Common causes of device overheating include:
- Prolonged intensive processing tasks
- Blocked ventilation areas
- Outdated software
- Battery degradation
- Environmental temperature
- Running multiple high-demand applications
Effective cooling strategies require both software and hardware interventions. Start by examining your device’s physical environment and usage patterns. Ensure adequate airflow around the device and avoid using it in direct sunlight or extremely warm conditions.
Practical DIY cooling solutions:
- Clean device vents and fans
- Update operating system and applications
- Reduce screen brightness
- Close unnecessary background applications
- Use power-saving modes
- Remove protective cases during intensive tasks
Some devices might require more advanced interventions like thermal paste replacement or fan cleaning. These procedures demand precision and careful handling. If you’re uncomfortable with internal device maintenance, consulting a professional repair service is recommended.
Battery health significantly impacts device temperature. Monitor battery performance and consider replacement if you notice consistent overheating. Modern devices often include built-in temperature monitoring tools that can help diagnose underlying issues.
Remember that prevention is always more effective than repair. Regular maintenance, mindful usage, and prompt attention to temperature warning signs can help maintain your device’s optimal performance and longevity.
8: When to Seek Professional Help for Device Repairs
Not every device repair should be a do-it-yourself project. While basic maintenance and simple fixes can save money, some technical challenges require professional expertise. Understanding when to seek expert assistance can prevent costly mistakes and potential permanent device damage.
According to Consumer Reports, modern devices have increasingly complex designs that make self-repair challenging. Complex internal architectures often require specialized tools and technical knowledge.
Signal indicators that professional repair is necessary include:
- Persistent hardware malfunctions
- Water damage
- Motherboard or logic board issues
- Complex software corruption
- Physical trauma beyond surface damage
- Warranty-related repairs
Financial considerations play a crucial role in repair decisions. Check your device’s warranty status before attempting repairs. If your device is still under warranty, unauthorized repairs might void coverage. Our laptop repair services can help preserve your device’s warranty while ensuring professional intervention.
Key factors to consider when deciding between DIY and professional repair:
- Complexity of the repair
- Cost of potential additional damage
- Technical skill level required
- Time investment needed
- Availability of specialized tools
- Potential warranty implications
Professional technicians bring comprehensive diagnostic capabilities. They can identify underlying issues that might not be immediately apparent to an untrained eye. Advanced diagnostic tools allow for precise problem identification and resolution.
Remember that some repairs, while seeming straightforward, can quickly become complicated. A small mistake during a DIY repair could transform a minor issue into a major, expensive problem. When in doubt, consulting a professional is always the safest approach to device maintenance and repair.
Below is a comprehensive table summarizing the core DIY device repair examples, benefits, and essential steps covered throughout the article.
| Repair Topic | Key Points & Steps | Benefits/When to Seek Help |
|---|---|---|
| Cracked Smartphone Screen | Assess damage, gather precision tools, follow safety protocols; minor cracks stabilized with screen protector | Saves money if done safely; seek help for major damage |
| Replacing a Dead Battery | Use correct tools, match battery specs, work in static-free environment; handle with care | Prolongs device life; consult pros if unsure or for sealed units |
| Audio Issues Troubleshooting | Check settings, connections, drivers, and devices; update/restart, test in safe mode | Resolves most sound problems; pro help for hardware failure |
| Cleaning/Repairing Charging Ports | Carefully remove debris with soft tools, use compressed air; don’t force or use metal objects | Restores charging; professional help for bent/broken ports |
| Resolving Software Glitches | Restart, update software, clear cache, reinstall apps, backup data before resets | Improves performance; see pros for persistent or complex issues |
| Upgrading Storage (SSD Installation) | Back up data, check compatibility, use correct tools, clone/transfer before installing SSD | Speeds up device; seek help for complex or unclear upgrades |
| Solutions for Overheating Devices | Improve airflow, clean vents/fans, use power-saving, monitor battery, avoid heat exposure | Prevents damage; professional cleaning for internal fixes |
| When to Seek Professional Repair | Complex hardware, water damage, logic board, persistent issues, warranty checks | Protects warranty, reduces risk, ensures correct diagnosis |
Take the Next Step From DIY to Guaranteed Results
You have just explored practical solutions for fixing cracked screens, replacing dead batteries, and troubleshooting audio and charging issues. Even with clear guides, certain repairs can become stressful or risk your device’s safety if anything goes wrong. Problems like persistent glitches or failed battery swaps can steal your time and peace of mind. Instead of facing uncertainty and risking more damage, let proven professionals take over.

Choose fast, affordable help for your phone, tablet, or laptop. With Cell Phone Repair Experts and specialized iPhone repairs, our skilled team brings you trusted fixes, clear pricing, and real warranties. Do not wait until a small problem leads to a costly replacement. Visit Dash Repairs now for real answers and quick turnaround. Secure your device’s future today with the support you deserve.
Frequently Asked Questions
What are the basic tools needed for smartphone screen repair?
You will need a precision screwdriver set, plastic opening tools, tweezers, an anti-static wrist strap, and a replacement screen if necessary.
How can I troubleshoot audio issues on my device?
Start by checking volume settings, cable connections, and testing different audio output devices. Ensure that your software and drivers are updated, and consider restarting your device if issues persist.
What steps should I take before replacing a device battery?
Power down the device completely, disconnect it from any power source, and work in a static-free environment. Make sure to use the correct battery type that matches your device specifications.
How do I determine when to seek professional help for device repairs?
Consider professional help if you face persistent hardware malfunctions, water damage, or complex software corruption. If repairs require specialized tools or knowledge beyond your expertise, consult a technician.