Over 60 percent of people who attempt mobile device repairs for the first time end up losing screws or damaging tiny parts. A well organized workspace and systematic approach can make all the difference between a successful repair and a costly mistake. Whether you are swapping out a cracked screen or resolving stubborn software issues, this practical guide breaks down each step so you can tackle repairs confidently and protect your valuable tech.
Table of Contents
- Step 1: Prepare Your Workspace And Gather Tools
- Step 2: Diagnose Common Mobile Issues
- Step 3: Disassemble Your Device Safely
- Step 4: Replace Damaged Parts Systematically
- Step 5: Reassemble And Test Device Functionality
Quick Summary
| Key Point | Explanation |
|---|---|
| 1. Create a Clean Workspace | Set up a well-lit, organized area to avoid damaging your device and enhance focus during repairs. |
| 2. Systematically Diagnose Issues | Observe your device behaviors and compile a symptom log to identify the root causes of problems. |
| 3. Document Disassembly Steps | Take photos or notes during disassembly to aid in reassembly and ensure proper component placement. |
| 4. Ensure Proper Part Replacement | Verify that new parts match original components precisely and follow manufacturer guidelines during installation. |
| 5. Test Device After Reassembly | Conduct thorough tests on the device functions after reassembly to confirm successful repairs before use. |
Step 1: Prepare Your Workspace and Gather Tools
Before diving into mobile device repair, setting up a strategic workspace is crucial for success. According to elktech.org, creating a clean and organized environment prevents potential damage and ensures a smooth repair process.
First, select a well lit area with a flat surface like a sturdy table or workbench. Spread out a soft cloth or anti static mat to protect your device and create a designated workspace. Gather your essential tools beforehand: precision screwdriver set, plastic spudgers, tweezers, magnifying glass, anti static wrist strap, and organizing containers for small parts. As ncbce.org recommends, maintaining a clutter free area helps you stay focused and reduces the risk of losing tiny components.
Pro Tip: Always work in a static free zone to prevent accidental electronic damage.
With your workspace prepared, you are now ready to begin the careful process of mobile device repair.
Step 2: Diagnose Common Mobile Issues
Understanding the root cause of your mobile device problem is the first critical step in successful repair. According to tricityprep.org, effectively diagnosing mobile issues requires a systematic approach of identifying symptoms and establishing probable causes.
Start by observing your device’s specific behavior. Is the screen unresponsive? Are apps crashing randomly? Are there connectivity problems or battery drain issues? elktech.org recommends creating a detailed symptom log to track when and how these problems occur. Check for obvious signs like physical damage, unusual error messages, or unexpected performance changes. Note the frequency of the issue and any potential triggers such as specific apps, charging conditions, or environmental factors.
Pro Tip: Restart your device before diving into complex diagnostics. Many issues resolve themselves with a simple reboot.
Once you’ve gathered comprehensive information about the problem, you’re prepared to move forward with targeted troubleshooting steps. Check out our guide on the 7 most common phone repairs for more insights into specific mobile device issues.
Step 3: Disassemble Your Device Safely
Disassembling a mobile device requires precision, patience, and careful preparation. According to elktech.org, safely taking apart your device involves using appropriate tools and following manufacturer guidelines to prevent potential damage to sensitive components.
Begin by powering off your device completely and removing the battery if possible. Gather your precision screwdriver set, plastic prying tools, and a magnetic screw tray to keep tiny parts organized. ncbce.org recommends documenting each step of disassembly with photos or notes to help you remember the exact placement of components. Work slowly and methodically, applying gentle pressure when removing screws or separating parts. Pay close attention to ribbon cables and connectors these are often the most fragile elements inside your device.

Pro Tip: Take a photo of your device before disassembly as a visual reference for reassembly.
With careful attention and steady hands, you are now ready to explore our step by step iPhone screen repair guide for more detailed disassembly techniques.
Step 4: Replace Damaged Parts Systematically
Replacing damaged mobile device components requires precision and careful planning. According to elktech.org, the key to successful part replacement is identifying faulty components and sourcing compatible replacements that match your specific device model.
Begin by carefully comparing the new part with the original component. Examine connectors, mounting points, and overall dimensions to ensure a perfect match. ncbce.org recommends following manufacturer guidelines during installation and using specialized tools designed for precise component replacement. Work methodically place components exactly as they were originally positioned secure connections gently but firmly and avoid applying excessive pressure that might damage delicate electronics.
Pro Tip: Always ground yourself and work on an anti static surface to prevent electrical discharge that could damage sensitive components.
Once you have carefully installed the new part, explore our guide on affordable device repair methods to help you complete your mobile repair with confidence.
Step 5: Reassemble and Test Device Functionality
Reassembling your mobile device is the critical final stage of your repair journey. According to elktech.org, successful reassembly requires meticulously reversing your earlier disassembly steps and ensuring every component is secured precisely in its original position.
Begin by carefully referring to the photos or notes you took during disassembly. ncbce.org recommends systematically replacing each component starting from the innermost parts and working outward. Align connectors carefully press components gently into place and replace screws in their original locations with consistent but gentle pressure. Once fully reassembled perform comprehensive functionality tests check touchscreen responsiveness power on all system functions verify battery performance and test each key component to confirm your repair was successful.
Pro Tip: If any screws feel tight or components seem misaligned stop and carefully readjust rather than forcing them.
With your device now repaired and tested, explore our practical examples of device repairs to further expand your mobile repair skills.
Take Control of Your Device Repair with Expert Support
Facing tricky mobile repairs can feel overwhelming when you want fast and reliable results without risking costly mistakes. This article highlights key challenges like diagnosing hidden issues, safely disassembling delicate parts, and replacing components carefully to avoid further damage. If you want to skip the frustration but still get your device fixed quickly, there is a better way.
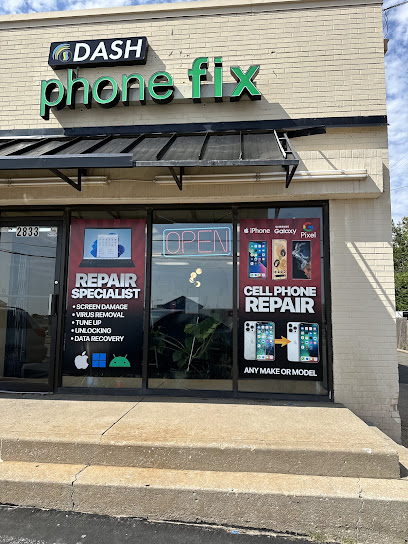
Enhance your DIY efforts with trusted professionals at Dash Repairs, where expert technicians specialize in fast, affordable fixes for smartphones and tablets. Whether you need help with cracked screens, battery replacements, or water damage, our Cell Phone Repair services provide the quality and peace of mind you deserve.

Don’t let repair challenges hold you back. Visit Dash Repairs now to explore our expert solutions and get your device restored the right way today. Ready for trusted repairs that save time and money? Check out our iPhone repair options and take the next step toward hassle-free device care.
Frequently Asked Questions
How can I prepare my workspace for DIY mobile repair?
To prepare your workspace, choose a well-lit area with a flat surface, such as a sturdy table. Use a soft cloth or anti-static mat to protect your device and gather essential tools like a precision screwdriver set and tweezers to streamline your repair process.
What steps should I follow to diagnose issues with my mobile device?
Start by observing your device’s symptoms, such as unresponsiveness or battery drain. Create a detailed symptom log to track behaviors and triggers, which will help you focus on specific problems during the repair.
What is the best way to disassemble my mobile device safely?
Before disassembling, power off your device completely and remove the battery if possible. Use appropriate tools like plastic spudgers and take detailed notes or photos of each step to ensure you remember where components go during reassembly.
How do I know which parts need replacement in my mobile device?
Identify damaged components by comparing the original part with the new one for size and connection compatibility. Be methodical—examine connectors and mounting points carefully to ensure a perfect fit.
What should I do to ensure my device functions correctly after reassembly?
After reassembling your device, conduct comprehensive functionality tests. Check features like touchscreen responsiveness and battery performance to confirm that your repairs were successful and everything is working as intended.

Is there a specific method to follow when replacing components?
Yes, follow manufacturer guidelines for replacing components, ensuring that you secure connections gently but firmly. Work systematically and prioritize grounding yourself to prevent static damage to sensitive parts.
Recommended
- 7 Affordable Device Repair Methods You Should Know | Dash Cellular Repair | Cell Phone, iPhone, Laptop Repair in Oklahoma
- 8 Practical Examples of Device Repairs You Can Do | Dash Cellular Repair | Cell Phone, iPhone, Laptop Repair in Oklahoma
- How to Quickly and Easily Fix Your Broken Cell Phone | Dash Cellular Repair | Cell Phone, iPhone, Laptop Repair in Oklahoma
- Choosing the Right Cell Phone Repair Shop | Dash Cellular Repair | Cell Phone, iPhone, Laptop Repair in Oklahoma
- Akkus reparieren Guide: So bringen Sie Ihre Akkus zurück ins Leben – accu.blog
- How to Minimize Downtime: Efficient Diesel Injection Repairs – My WordPress